Getting Started/Quick Start
Getting Started
Quick Start
Create an ApiHug project, understand the module layout, and run the contract-first toolchain.
Use this page to go from an empty directory to a running ApiHug demo project. The path is simple: prepare your machine, generate a project, run the build loop, and inspect the generated API surface.
ApiHug 3.x targets Spring Boot 4.0 and newer. Review the Spring Boot 4.0 migration guide before upgrading an existing project.
What You Will Do
In a typical first run, you will:
- initialize an ApiHug workspace
- generate a demo project from the IntelliJ wizard or Apihug REPL
- run
wire, then the application (bootRun) - open the generated OAS document
Before You Start
Initialize a Workspace
ApiHug provides bootstrap scripts for common shells.
iex (irm 'https://raw.githubusercontent.com/apihug/apihug.github.io/main/helper/apihug-install.ps1')If you are upgrading an existing Spring project, review the Spring Boot 4.0 Migration Guide before moving the ApiHug SDK forward.
Prepare the Development Stack
Prepare the standard development stack first:
- JDK 17 or newer
- Gradle 8 or newer
- IntelliJ IDEA 2022 or newer
- the
ApiHug - API design Copilotplugin - access to Spring Initializr or an equivalent internal bootstrap flow

IntelliJ Plugin
Install the plugin from JetBrains Marketplace, then restart IntelliJ.
If you prefer a terminal-first workflow later, ApiHug REPL is a good companion. For first-time setup, the IntelliJ wizard is still the fastest way to understand the generated project shape.
Plugin Install Path
- Open
File > Settings > Plugins - Search for
ApiHug - Install the plugin
- Restart IntelliJ
Generate a Project
The IntelliJ wizard gives you a complete starting point for contract-first development.
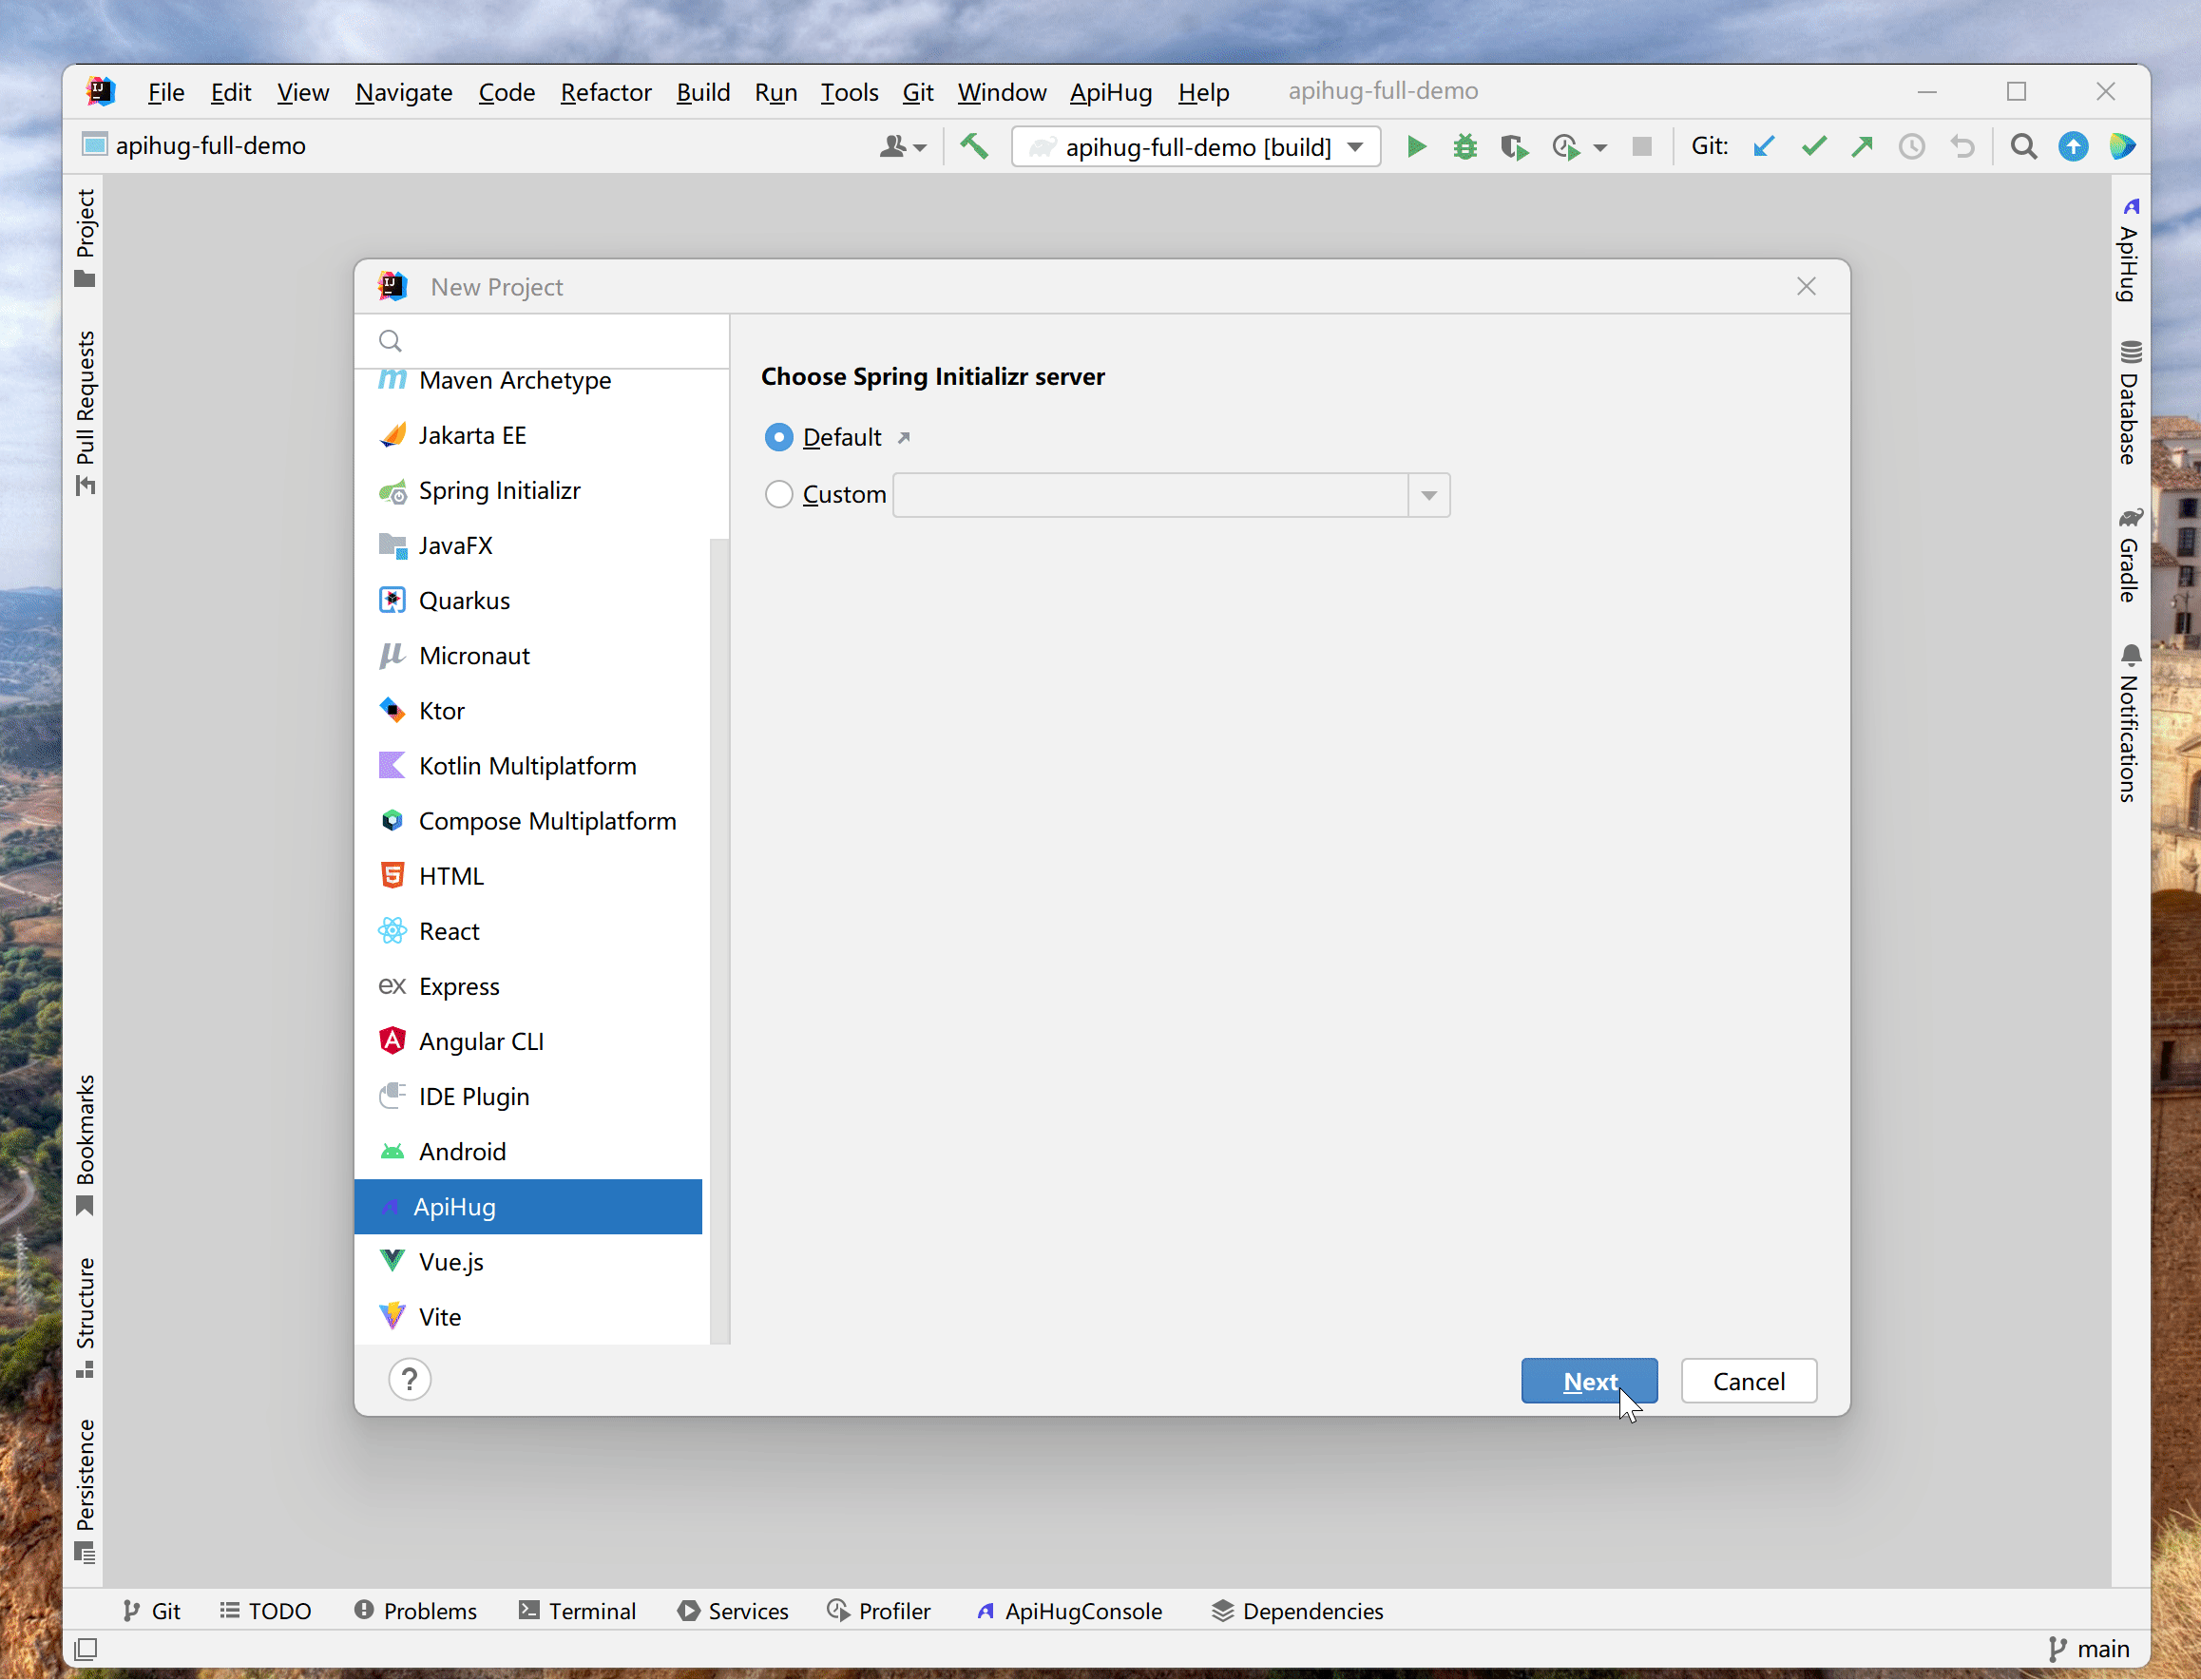
1. Start an ApiHug Project
- Open
File > New > Project - Select
ApiHug - Continue to the project settings step
2. Fill in Project Settings
Set the package, project name, description, SDK options, database vendor, cache, and port.
Keep the default choices for your first project unless your team already has a standard template.
An ApiHug project usually starts with two modules:
order
|- order-app
`- order-app-proto
orderis the root workspaceorder-appis the handwritten application moduleorder-app-protois the contract module that drives generation
3. Pick Spring Components
This step follows the same mental model as Spring Initializr. Pick the base project type, then add starter dependencies such as Spring Web.

Finish with Create -> Open Project.
4. Load the Project as Gradle
If IntelliJ does not auto-import the project, reload it as Gradle. You should see both demo-app and demo-app-proto.
For existing projects, update gradle/libs.versions.toml and then reload Gradle so the new SDK version is applied consistently.
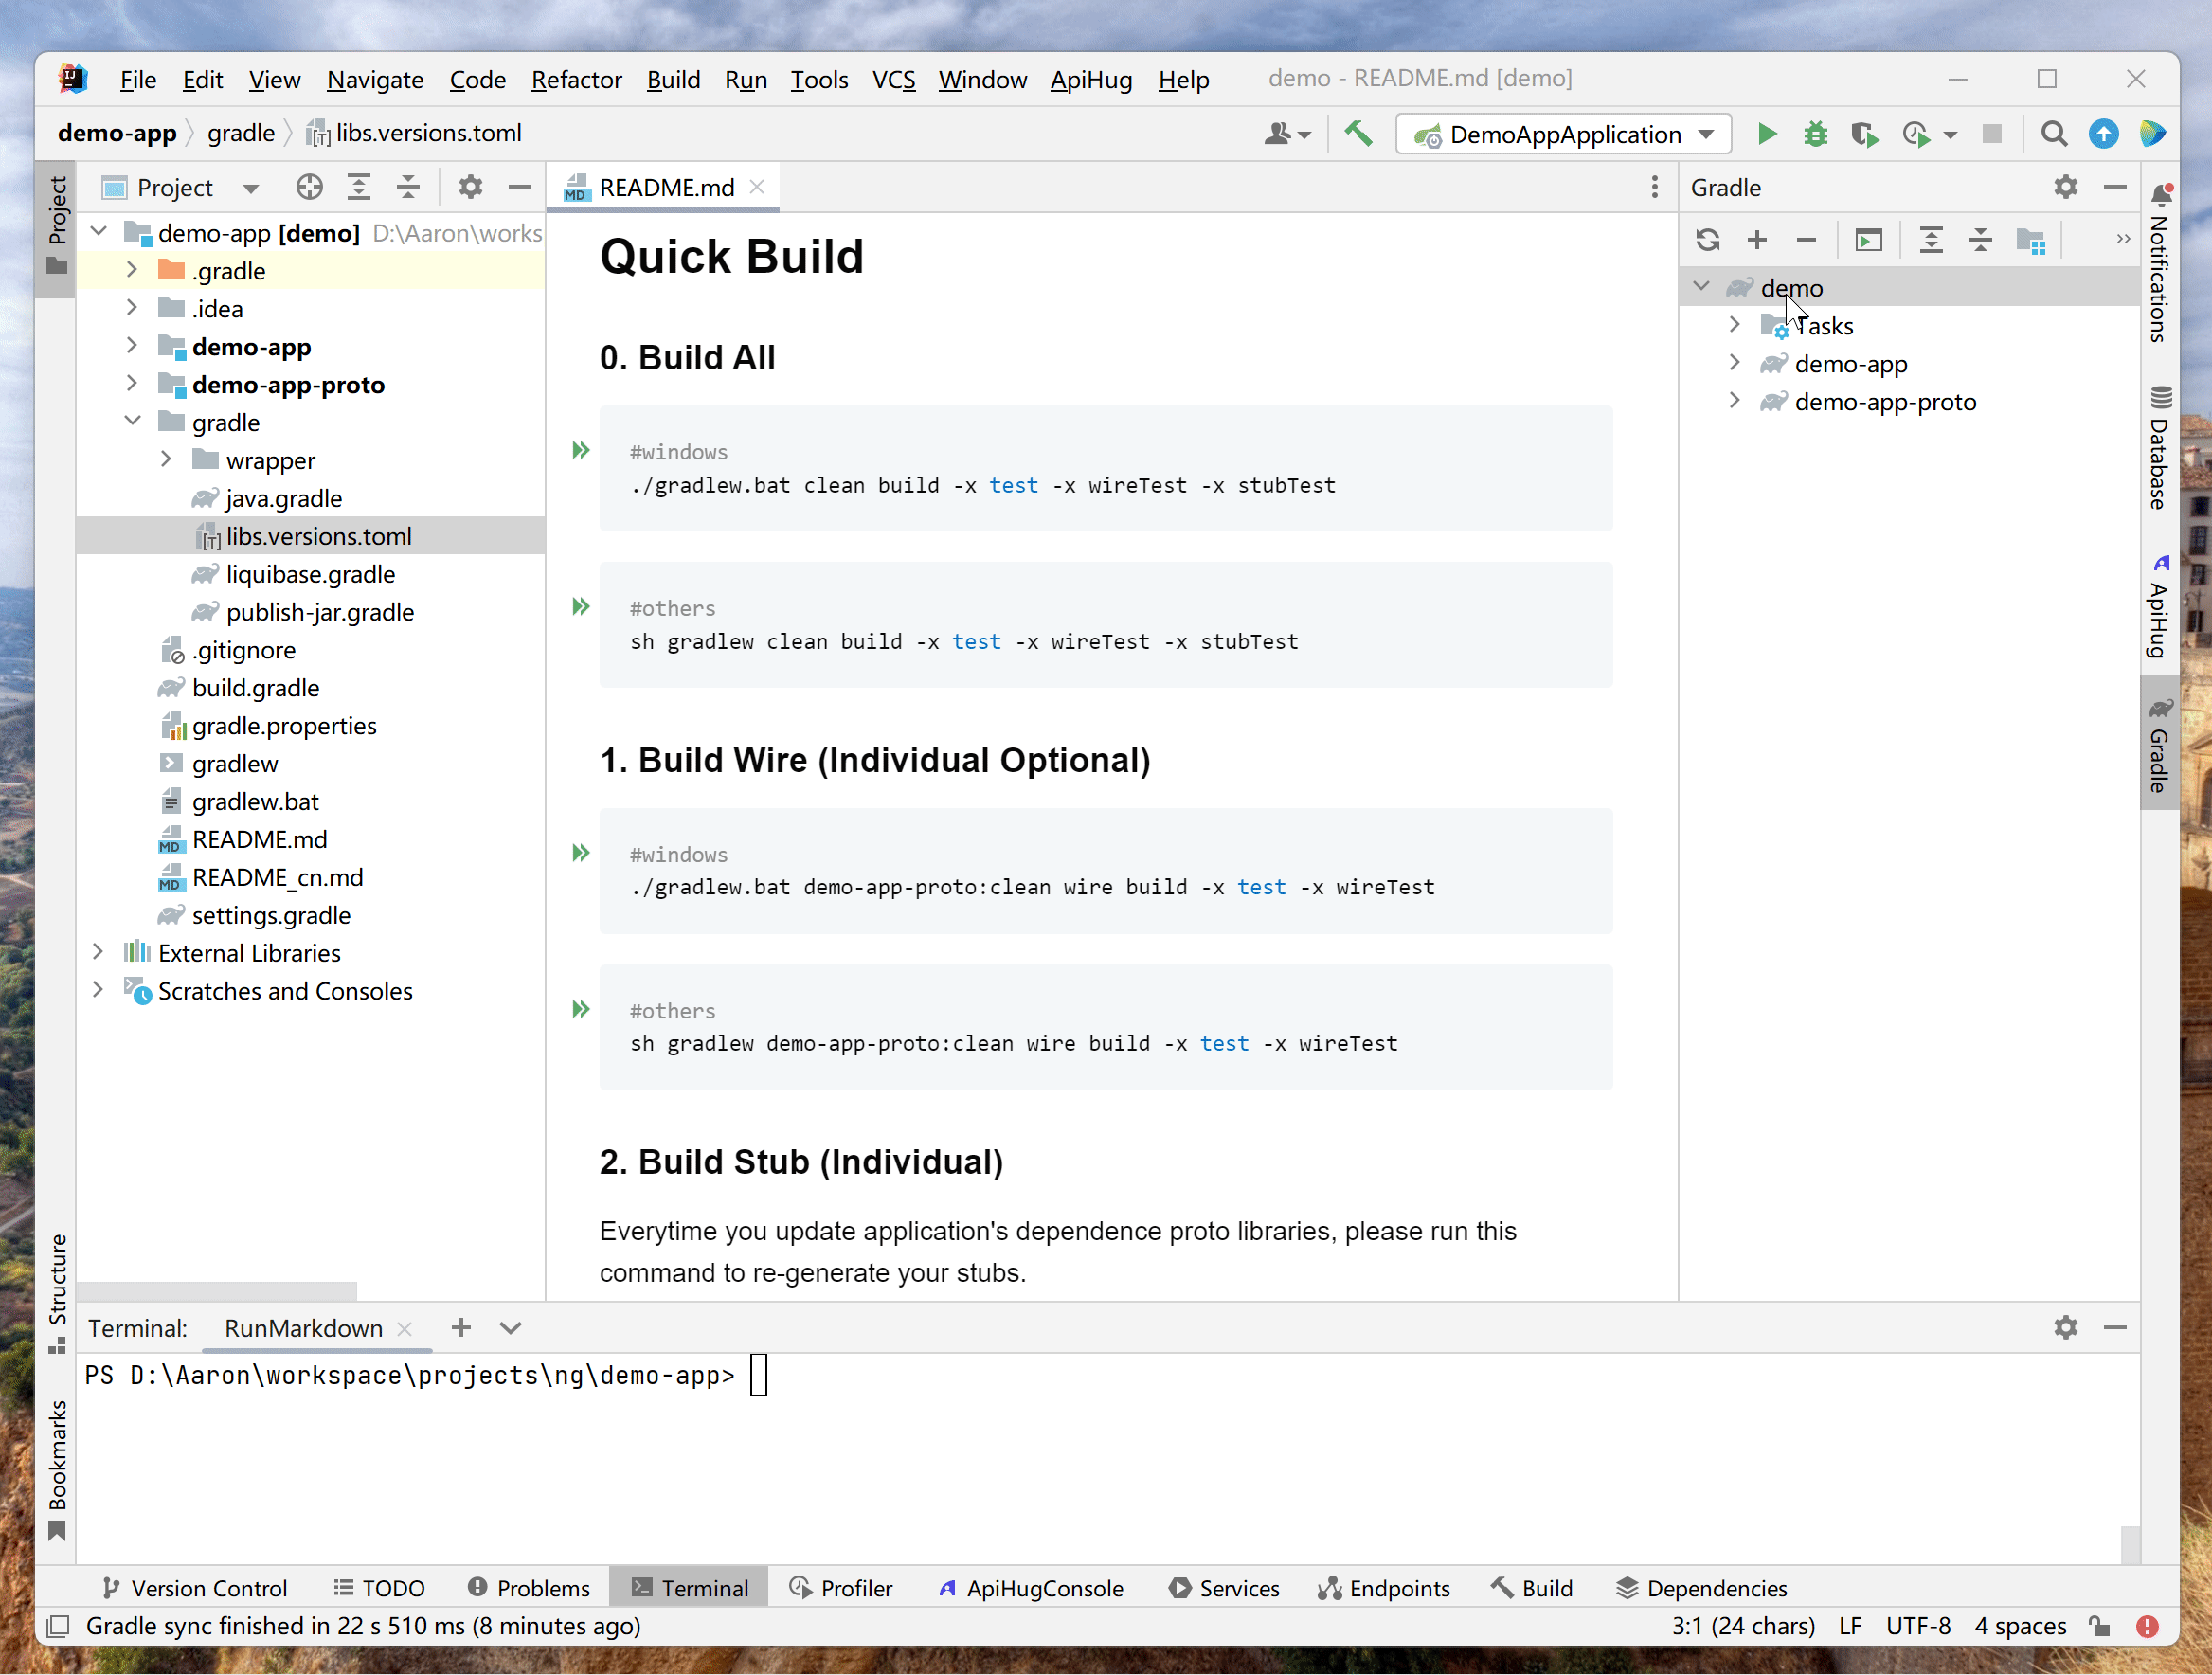
Understand the Project Layout
The simplest demo looks like simplest-demo:
+---gradle
|   |   libs.versions.toml  (1)
+---demo-app  (2)
|   |   build.gradle
|   \---src
|       \---main
|           +---java
|           |   \---com
|           |       \---apihug
|           |           \---demo
|           |               |   DemoAppApplication.java
|           |               +---domain
|           |               \---service
|           \---resources
|               |   hope-stub.json  (3)
|
+---demo-app-proto (4)
|   |   build.gradle
|   \---src
|       \---main
|           +---proto
|           |   \---com
|           |       \---apihug
|           |           \---demo
|           |               \---proto
|           |                   +---api
|           |                   \---infra
|           \---resources
|                   hope-wire.json (5)
| File | Role |
|---|---|
(1) libs.versions.toml | version catalog and plugin aliases |
(2) demo-app | application and handwritten logic |
(3) hope-stub.json | application-module generation config |
(4) demo-app-proto | protobuf contracts and wire output |
(5) hope-wire.json | proto-module metadata |
# versions
apihug = "<current-version>"
springBoot = "4.0.0"
springDependency = "1.1.7"

# libraries
apihugBom = { group = "com.apihug", name = "it-bom", version.ref = "apihug" }

# plugins
springBoot = { id = "org.springframework.boot", version.ref = "springBoot" }
springDependency = { id = "io.spring.dependency-management", version.ref = "springDependency" }
Run the Contract-First Loop
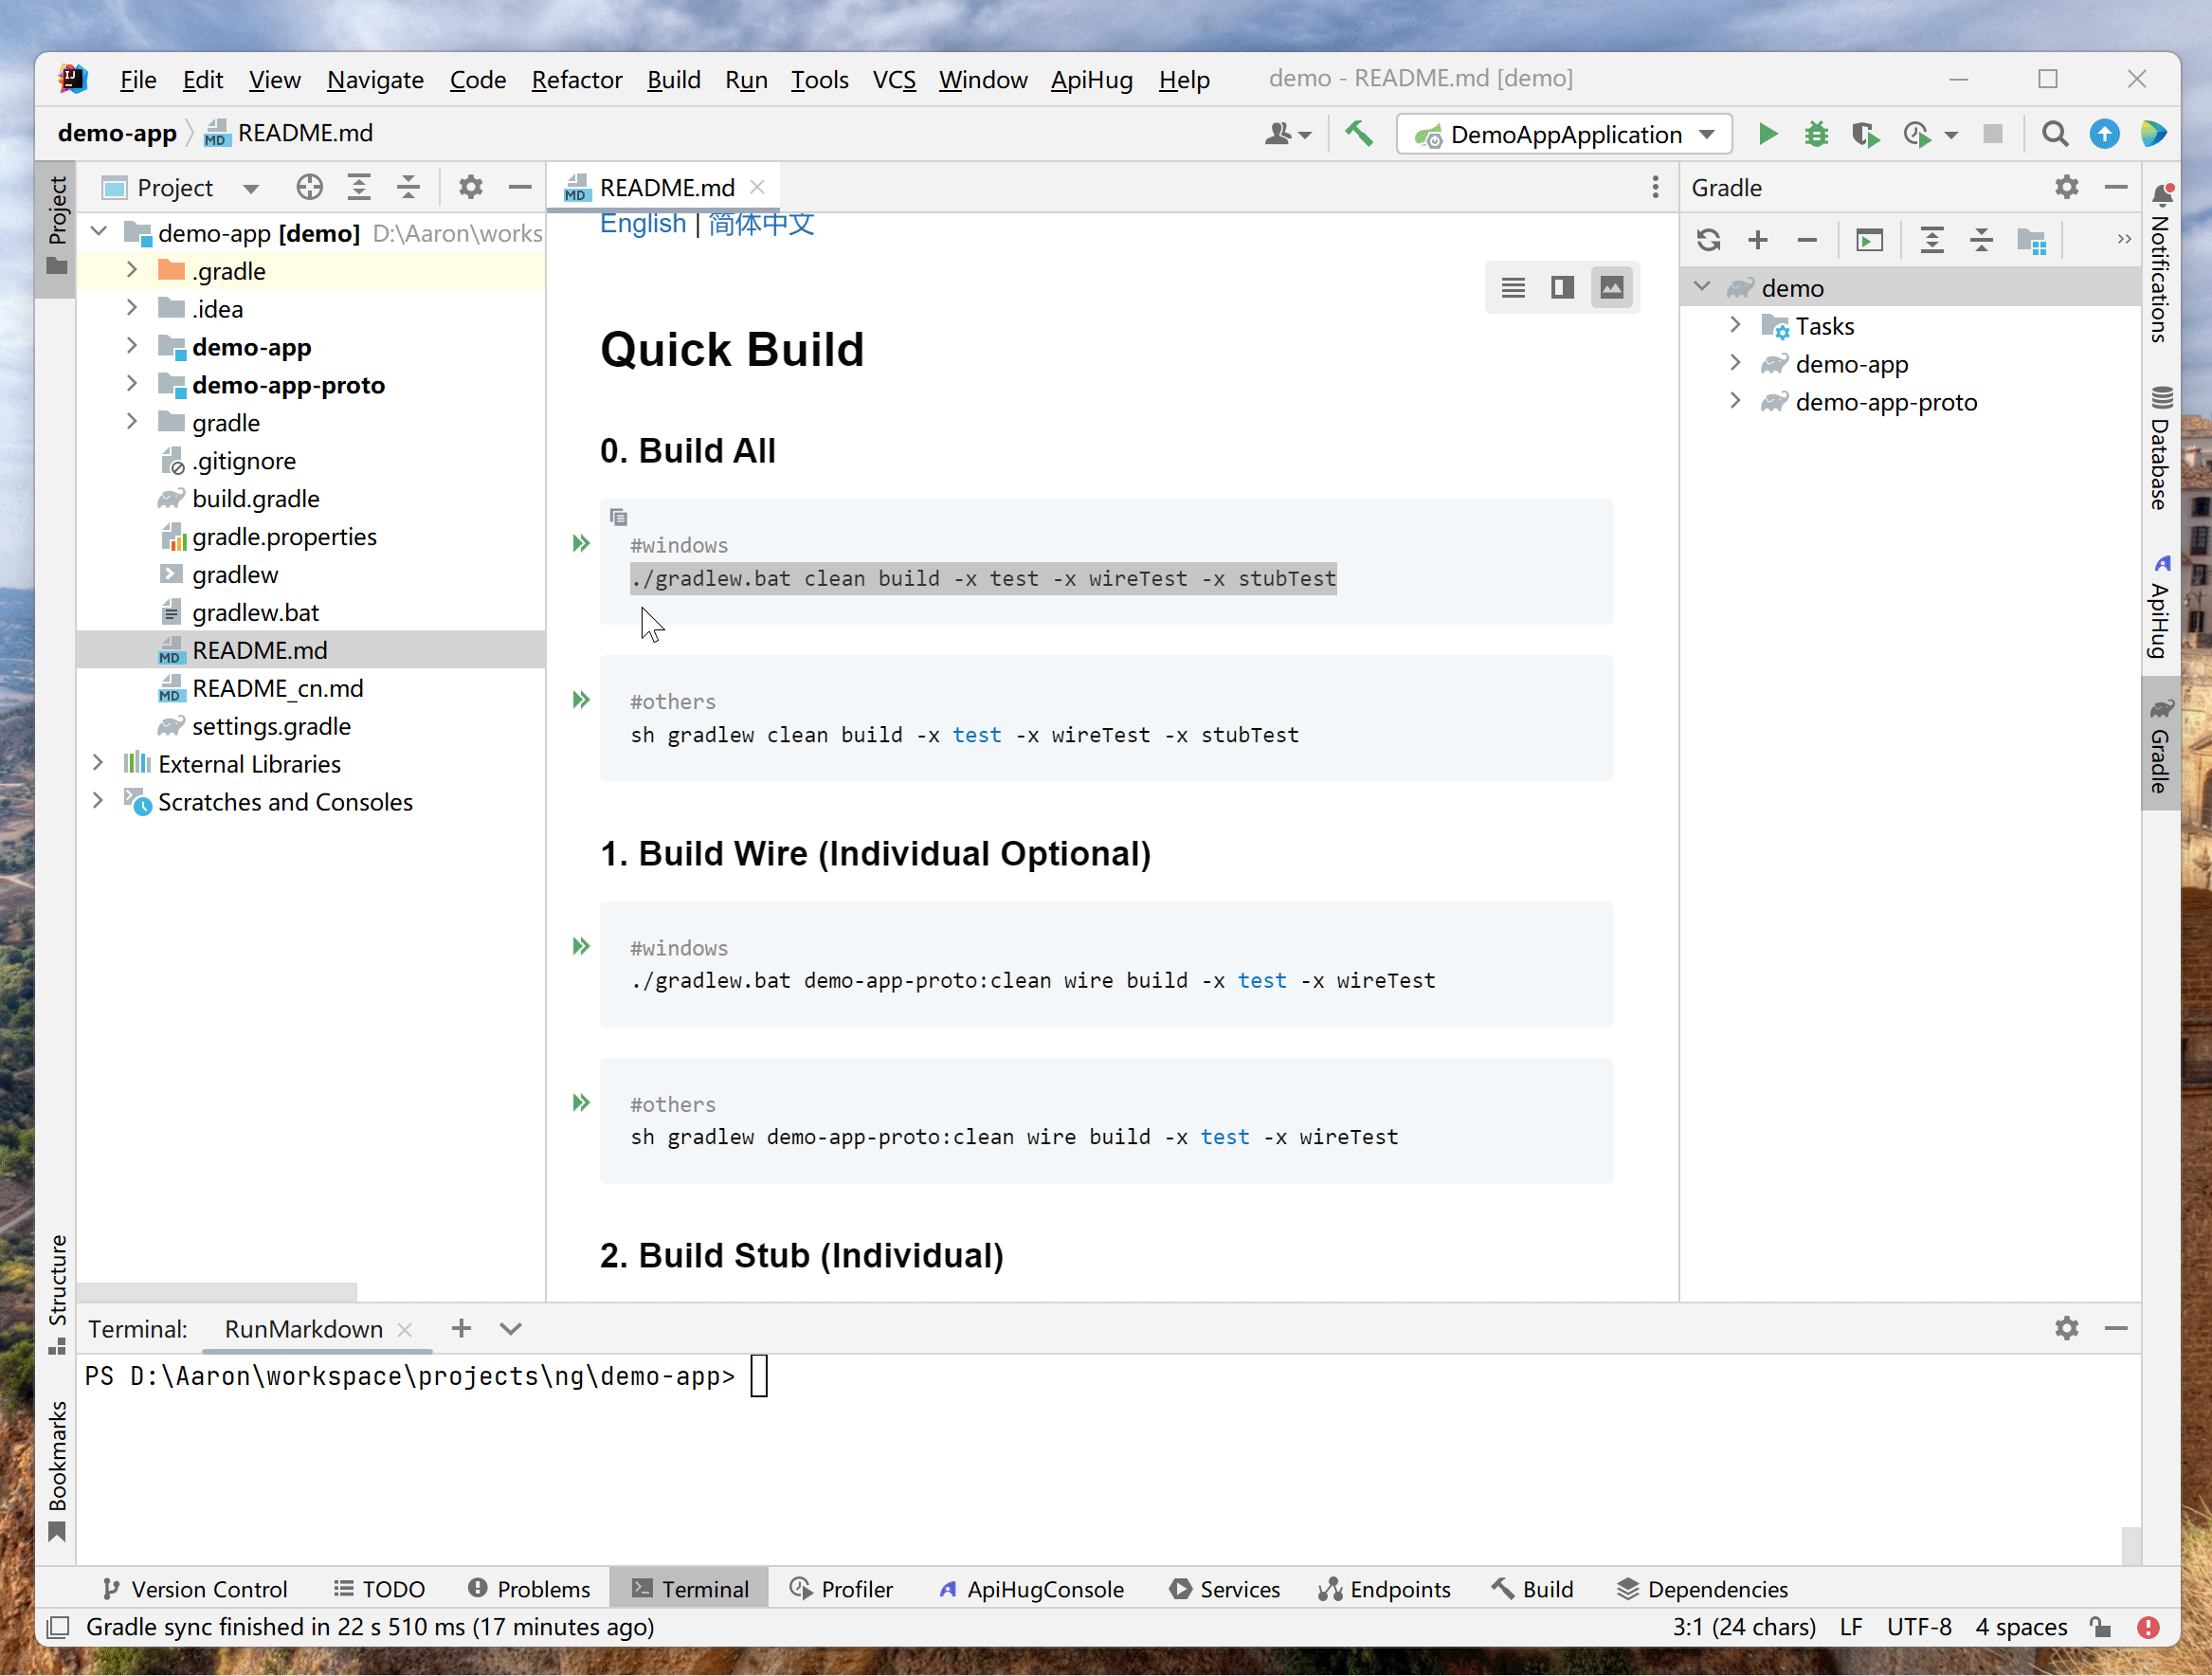
1. Run Wire
wire validates the proto module and generates the neutral build output.
- Open
README.md > 0. Build All - Copy the command into your terminal, for example
gradlew clean build -x test -x wireTest -x stubTest - Run it
- Check the generated output under
demo-app-proto
2. Run the Application
- Open
README.md > 3. Run Application - Run
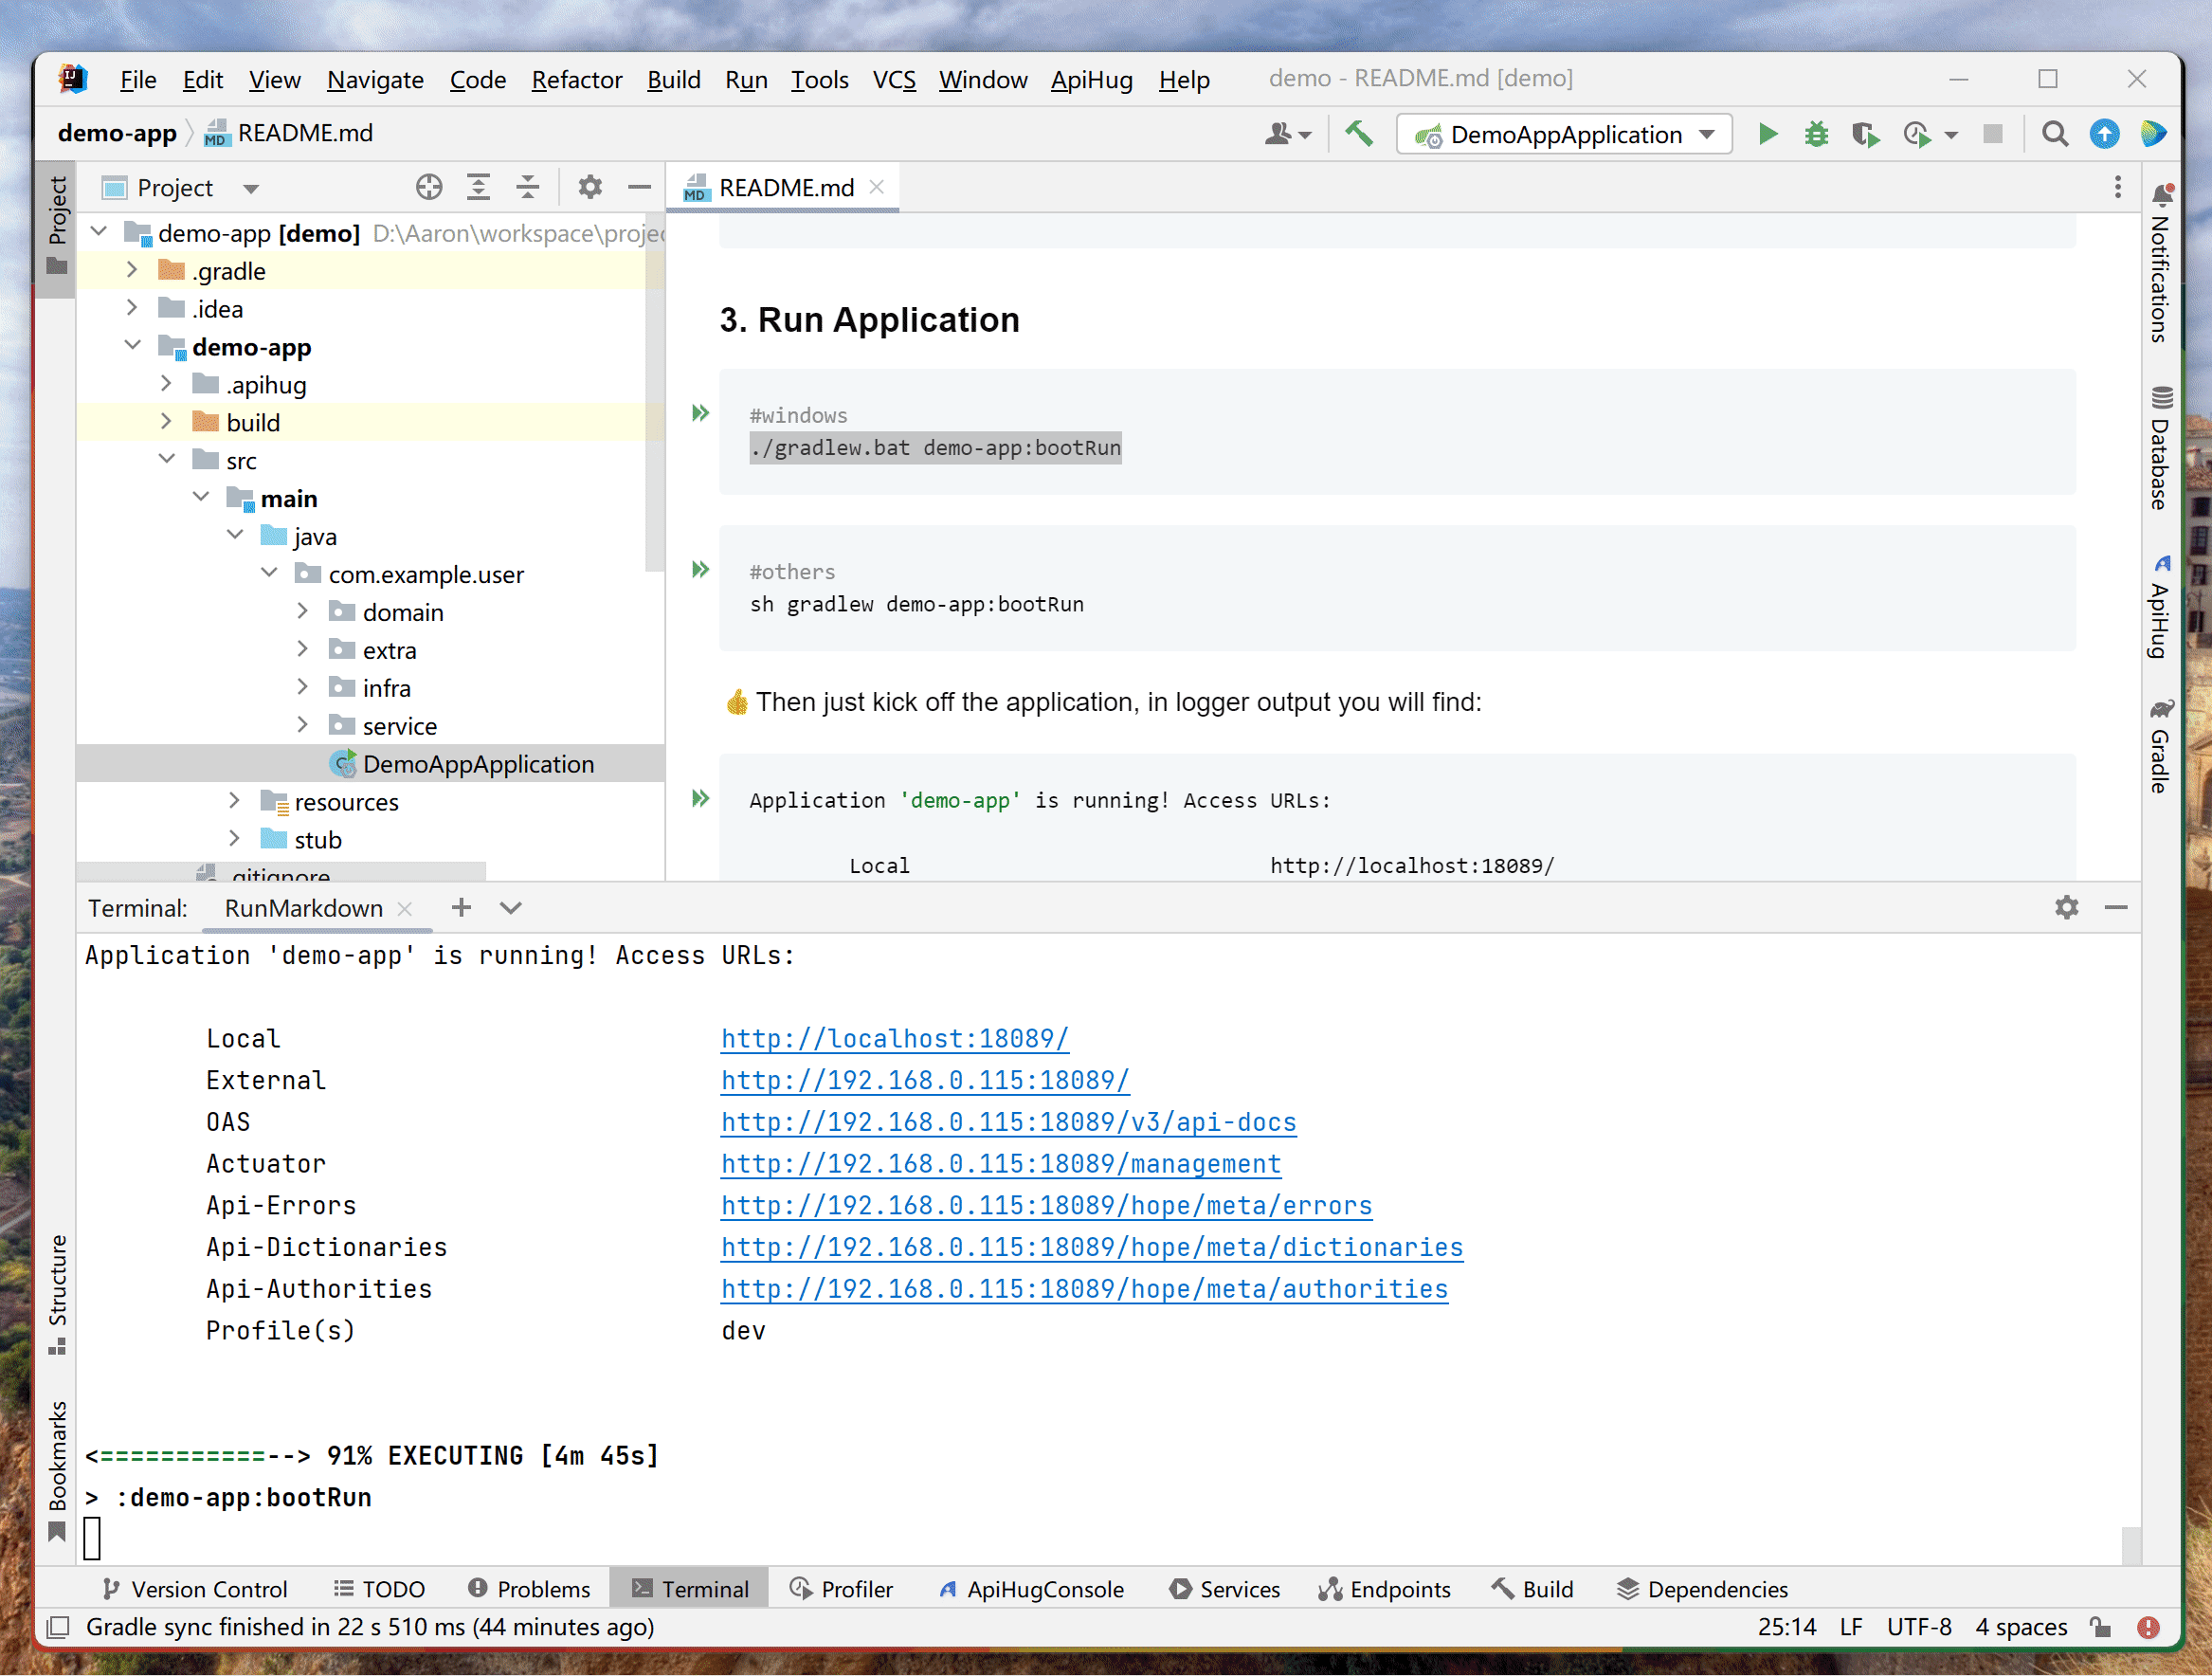
gradlew demo-app:bootRun - Confirm the application starts cleanly
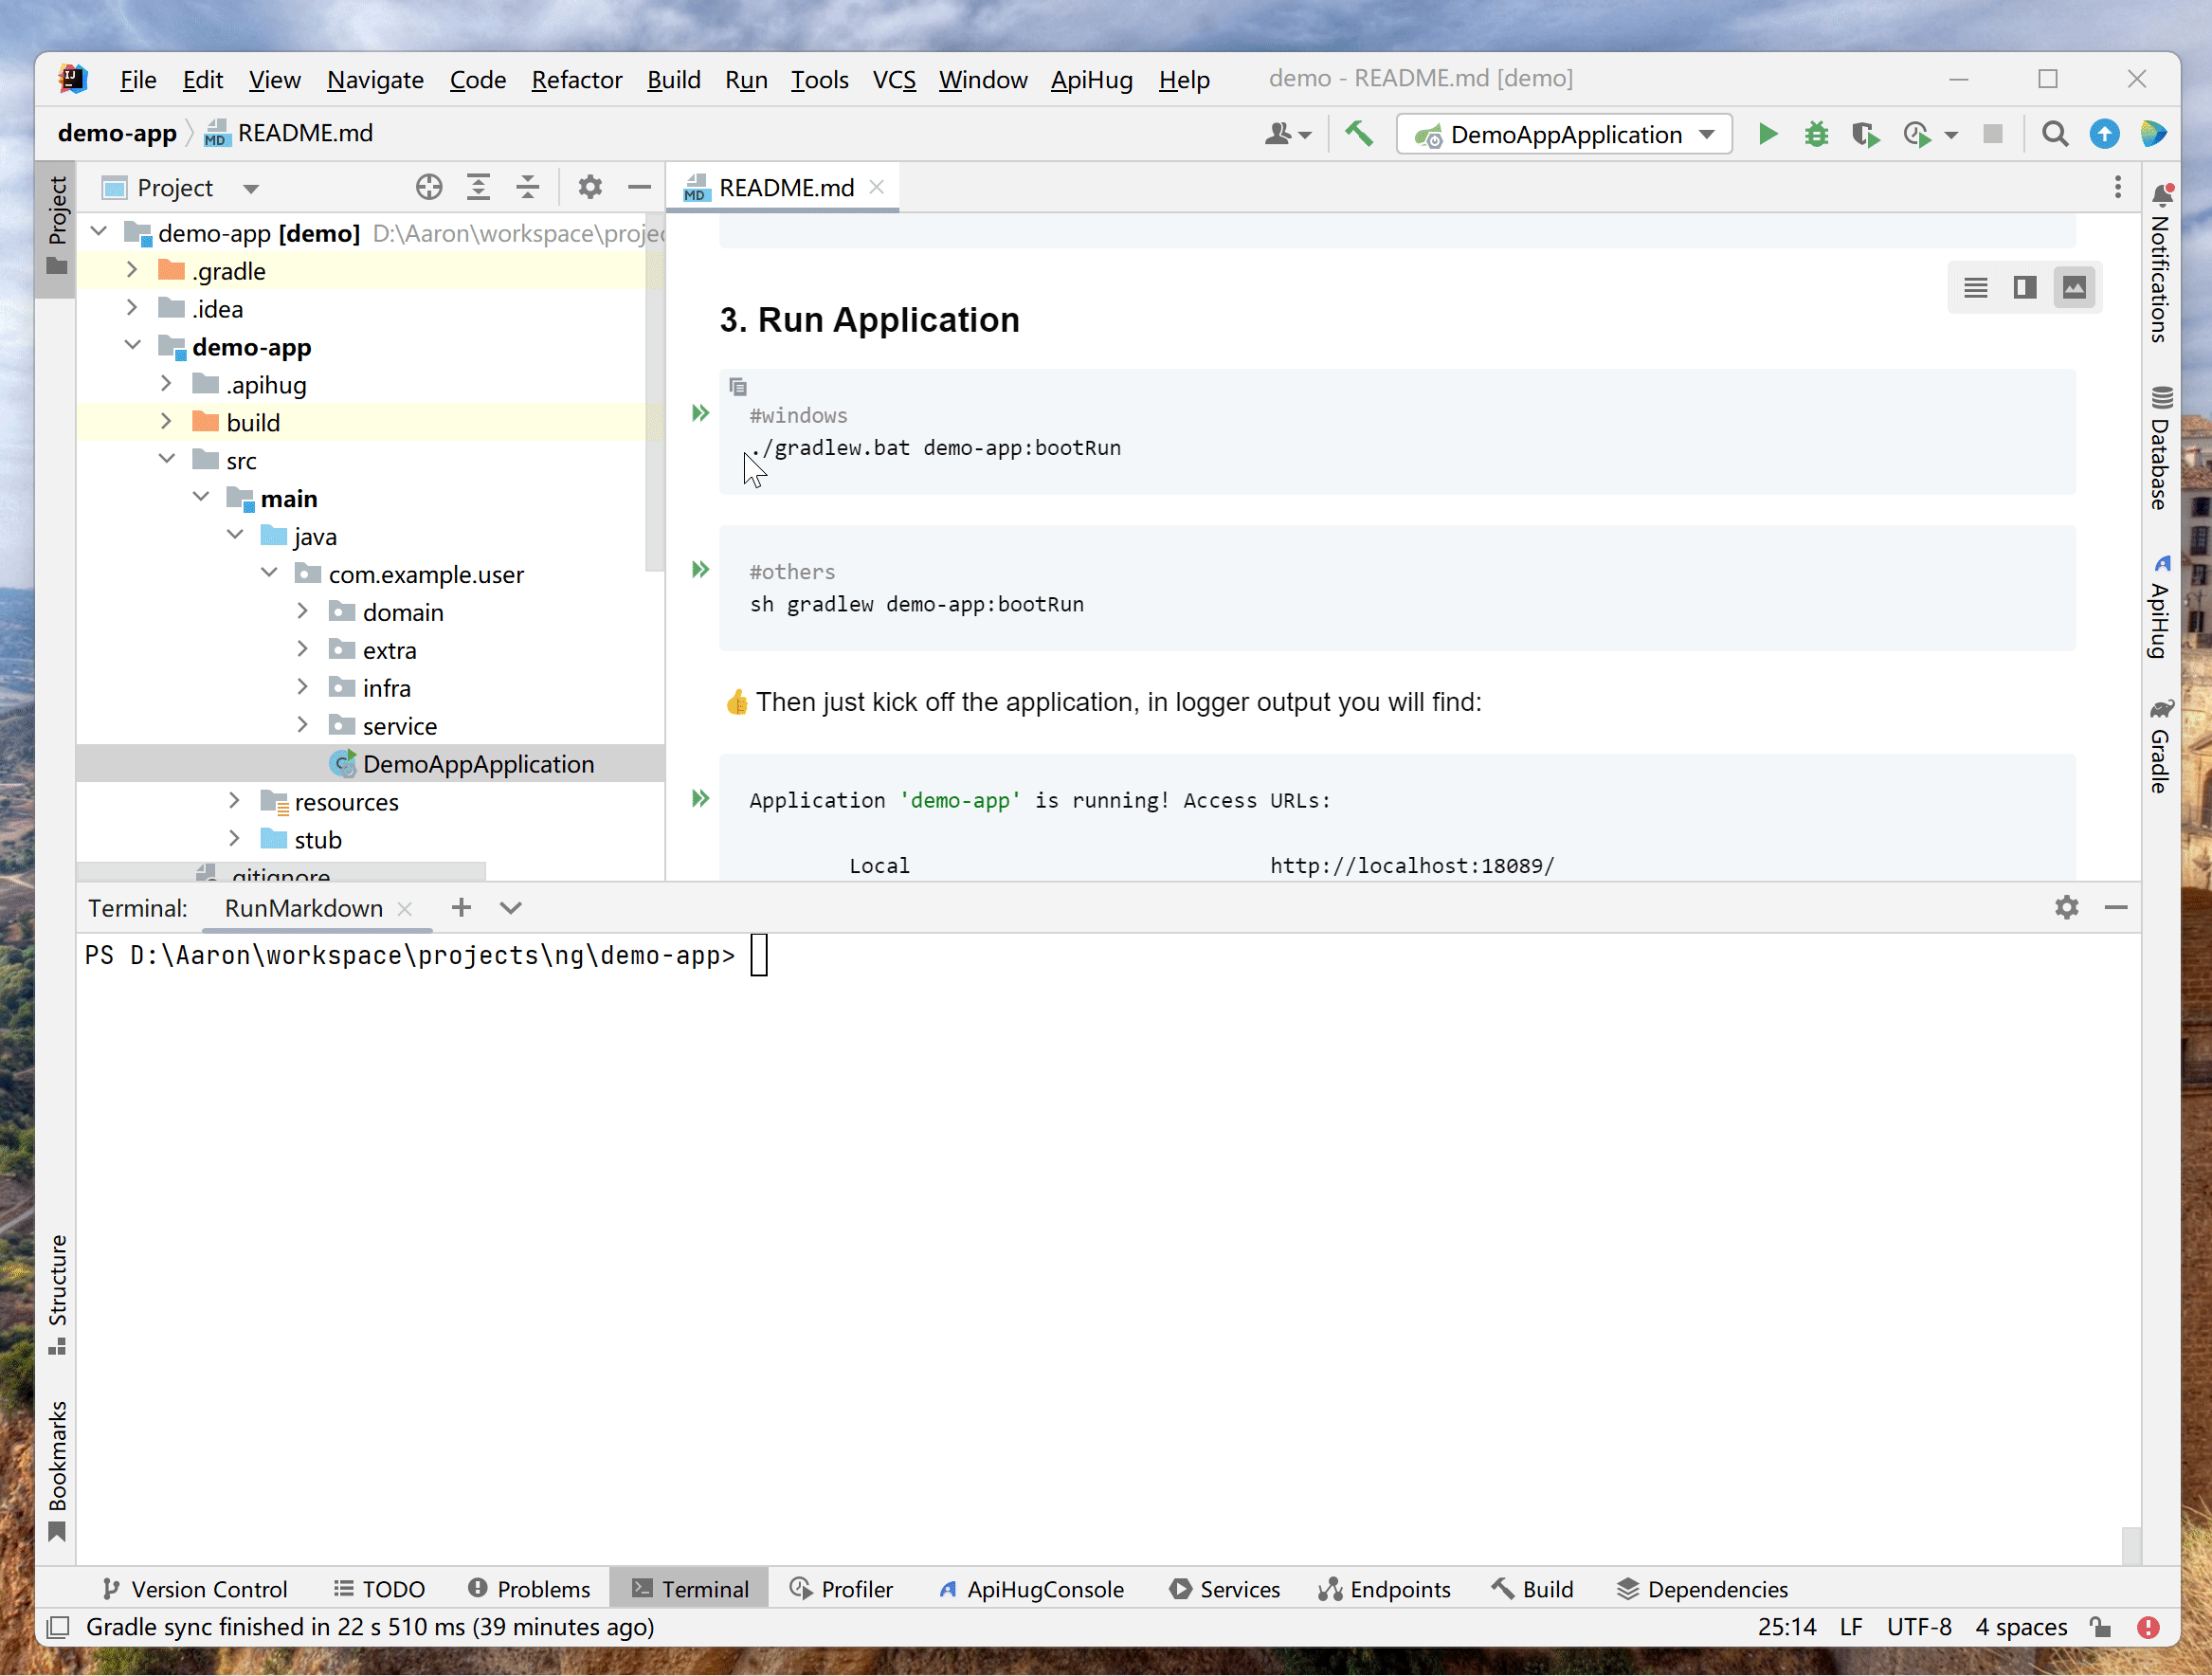
Application 'demo-app' is running! Access URLs:

Local                             http://localhost:18089/
OAS                               http://localhost:18089/v3/api-docs
Actuator                          http://localhost:18089/management
Api-Errors                        http://localhost:18089/hope/meta/errors
Api-Dictionaries                  http://localhost:18089/hope/meta/dictionaries
Api-Authorities                   http://localhost:18089/hope/meta/authorities
Profile(s)                        dev
3. Check the OAS Output
Copy the /v3/api-docs URL from the console, open it in your browser, and verify the generated contract surface.
Open the ApiHug Tool Window
The IntelliJ tool window should appear on the right side of the IDE. If not, open it from ApiHug > ApiHug Designer.
Next Step
Once the demo is running, move to:
- What is ApiHug? to understand the platform model
- Skills & Rules to learn the AI workflow
- Tool Chain to go deeper on REPL, BMAD, lint, wire, and stub